
A bit more complex this time: a small ruin terrain using styrofoam to simulate simple architecture.

Simple ruin base step-by-step
Step 1- I’m almost out of styrofoam (no kidding). The dense kind (blue or pink insulation foam is best). For this terrain I used left over pieces I had from past projects: since it is small, small pieces were ok. By the way, never discard scrap pieces of foam: even the smallest bits can be used as bricks or debris on a base.
Step 2- I did a very rough sketch to get a general idea of the piece I wanted to create. It is a good idea to get details such as engravings and carved symbols down on paper in advance if you can.

Step 3- I prepared a triangular base for the terrain (see part 1 of this serie for the “how to”).

Step 4- With a large cutting knife I got the basic shape of the stones. As always, be careful: when cutting foam, I always use very sharp and sometimes very long blades (like here to cut the largest stone). Styrofoam has the unique characteristic of being super-efficient at dulling X-acto blades, so if you do a bit more cutting than I did here, be prepared to change the blade a few times.


Step 5- After cutting the main pieces, I did a quick test assembly, to evaluate the progress: it is looking ok so far.

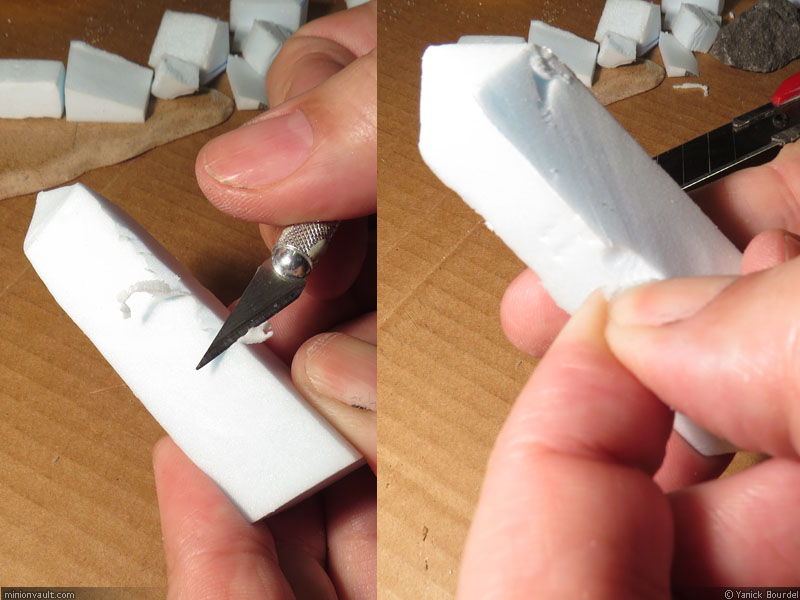
Step 6- Now I got those stones to look more like worn architecture. Using a smaller X-acto, I trimmed the edges to make them uneven and a bit jagged. Using my nails, I also tore some bits out: don’t overdo this kind of extreme damage, or it will look like a Tarrasque took a bit out of your terrain 🙂
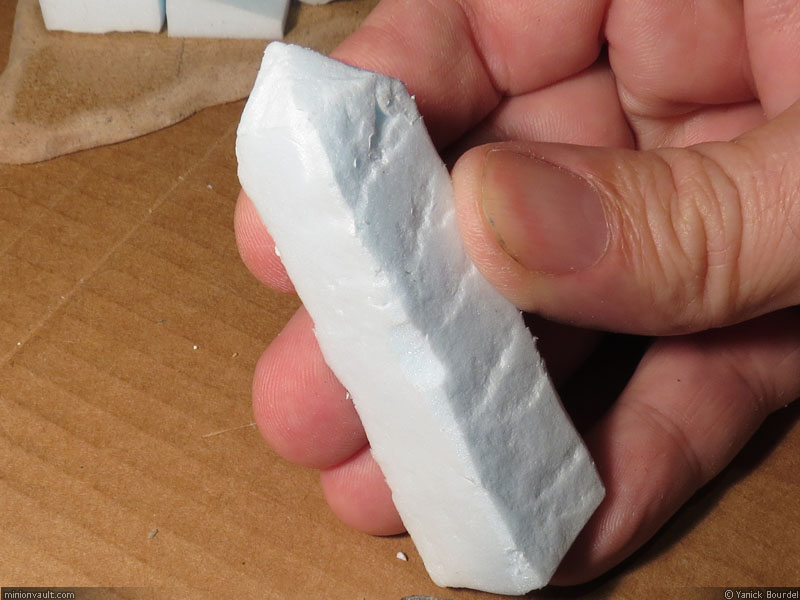
Step 7- A good trick: to make a convincing rock texture on styrofoam just press a small rock on the surface. Turn the rock often and use small jab like strokes, to avoid repeating the same patterns close to one another. I textured all the stones using this simple technique.

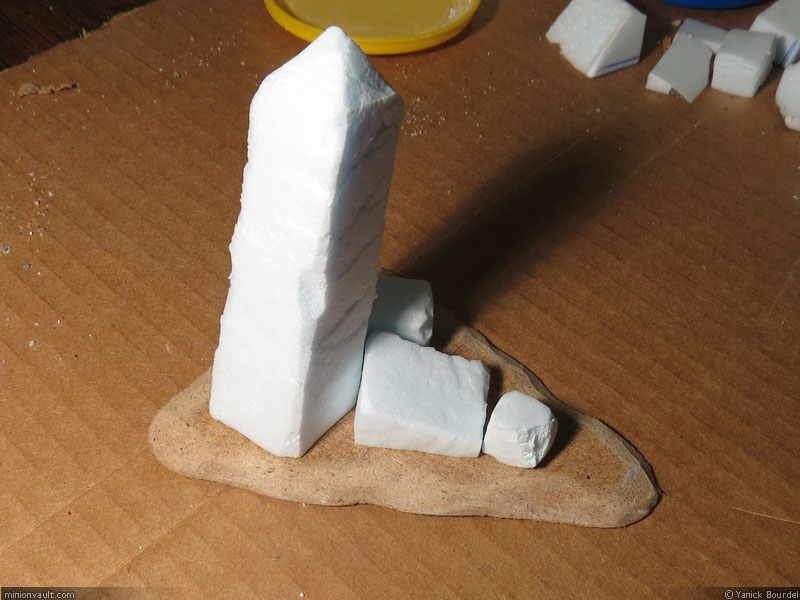
Step 8- Quick test assembly again:
Step 9- Using my sketch as a guide, I drew symbols on the face of the large obelisk. Use a fine felt point marker here.

Step 10- Time to “carve”. In fact, it is not really carving: I used a pencil to draw over the lines I drew previously, pushing on the foam to leave a mark. Easy. Quick. Cool! The same technique was used to create cracks on the stones.


Styrofoam stonework techniques demonstrated again:
The same techniques can be used to create convincing stone work easily. To demonstrate, I made a small wall section:
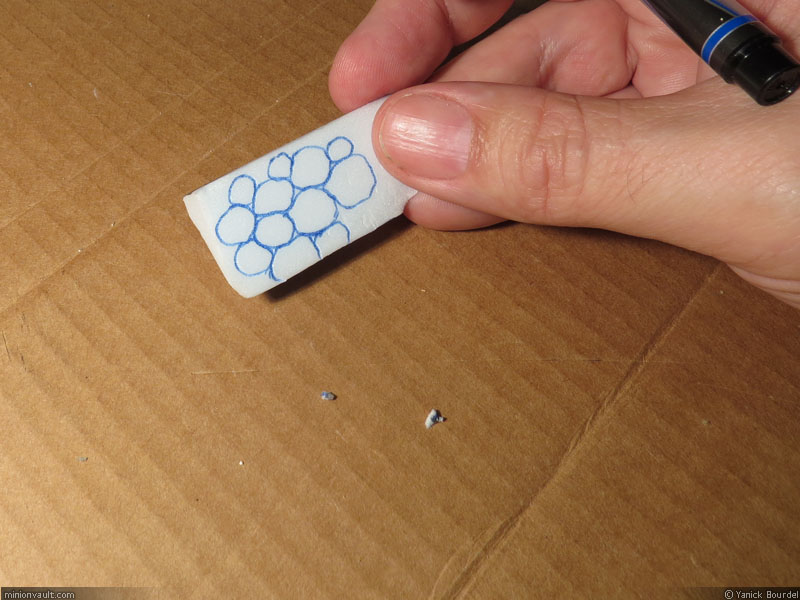
Drawing pattern.

Using a rock to create texture.

Using a pencil to “carve” (This time I push deeper, so the roundness of the pencil tip makes the individual stones edges rounder).

Result.

Push some stones inward using the tip of brush or similar tool, just to get the stones more uneven.

Final result: A stone wall.
Now back to the project…
Step 11- Well, I had no need for the stone wall I just made, so I decided to cut the wall so thin that I could use the stones to suggest floor stones around my ruins…

Step 12- Before gluing all the pieces to the base, I made irregular deep scratches on the bottom of each large piece of foam so the glue will have more surface to grip. The whole thing will be stronger that way. Remember that terrains are meant to be used on a gaming table and handled by fellow gamers, as opposed to dioramas or small-scale models which are much more fragile and should never get in contact with even a dust particle once they are finished 🙂 . So stronger bond is better here.

Step 13- I started by gluing all the large foam pieces, then I added the cobblestone like rocks I got from my wall.

Step 14- I used an old brush to smear glue all around the base…

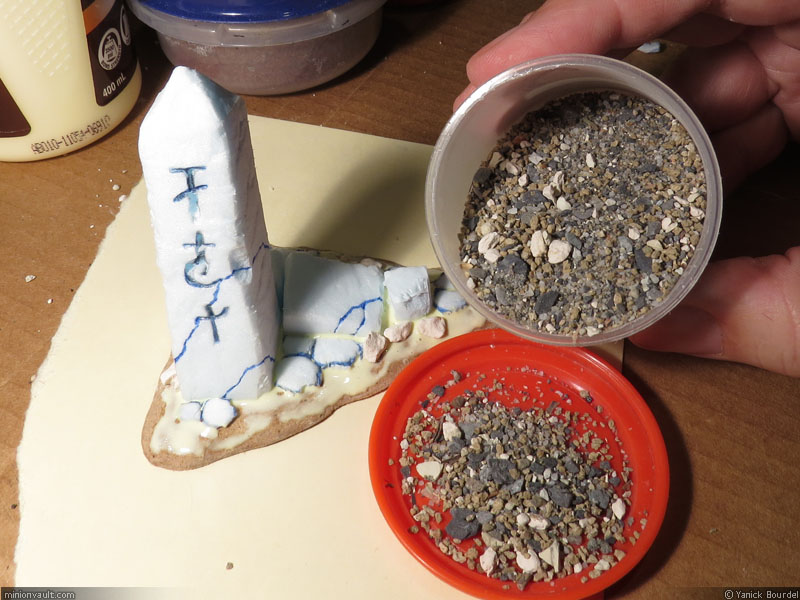
Step 14- …then I placed larger rocks, especially around the stone bases, to simulate smaller fragments of stone work. I also helps to create a naturally pleasing transition between the standing stones and the flat ground. I case you’re wondering, yes it is cat litter rocks (unscented and UNUSED).

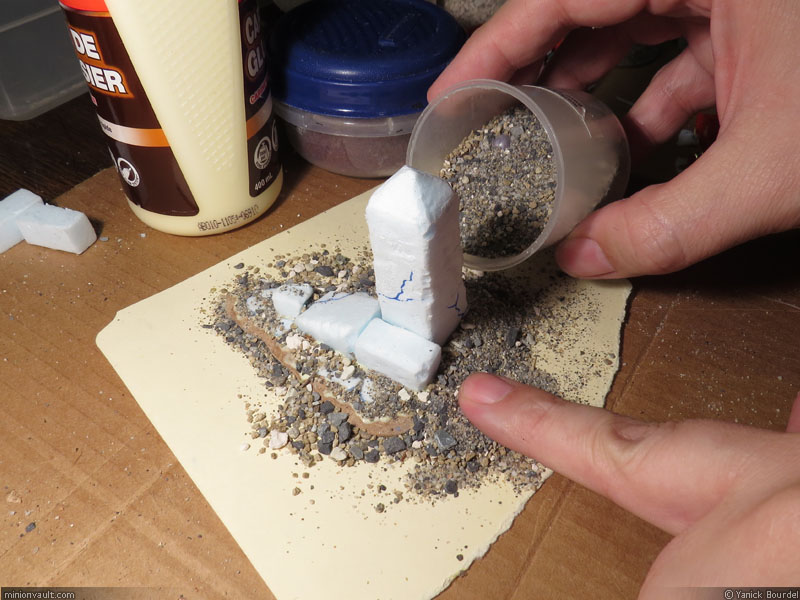
Step 15 – Pouring pre-mixed ground material (mix of sands, small rocks and …cat litter)
Step 16- I let it dry for 1 hour. Then I turned it upside down, gently tapping the base to get the loose material to fall on the paper. Then the left over material was put back in the pre-mix container.

Step 17- Last step: I generously brushed a 50/50 mix of water and white carpenter’s glue on the ground and let it set completely overnight.

Step 18- Building is done. This is the final result, before painting and vegetation work.
Stay tuned, in the 4th part of this Step-by-step, I will do the painting and vegetation for both terrain (the boulder one and this ruin one).
Yo!
