
Something new on the blog: step by step project posts. It’s not really tutorials, and not really w.i.p. too, but rather a documented making of a project with explanations and tips.
In this first part, I write about materials that will be used for part 2 and 3, where I will build 2 simple terrain pieces for the gaming table. Step by step 1, 2 and 3 are well suited for beginners, but they will be interesting to read (I hope) for veteran terrain crafters.
For paints, I will wait until part 4, where I will paint both terrain pieces.
Ok. Here we go.
Basic tools required to make terrains

Carpenter’s white glue (If you can, get the fast drying one – it takes about 1 hour to cure, which speeds up building steps), cutting pliers, wide blade cutting knife, X-acto knife, and a few old brushes. You can add to the list of tools: a pair of scissors, tweezers, sand paper (fine and coarse), and spare blades for the cutting knife and X-acto. The cutting pliers showed here are optional, but useful to cut branches, plastic bits or to chop of the sharp corners of some wood bases. I suggest using a plastic plate as a mixing palette for paints and glue for terrain projects. Have also a bottle of water nearby, as well as paper towels or rags. See? Really simple stuff, quite easy to find.
Important tip: use old / inexpensive brushes for terrain projects. They will get into glue, rocks, thick paints, and they will be brushed on rough surfaces… You don’t want to do this to your precious precision brushes you use for painting miniatures…
How I make a base for terrain
First we need some support for the terrain piece. A wide array of material can be used here: strong cardboard, particle board, MDF, foam-core art board, plywood, tempered hardboard or masonite.
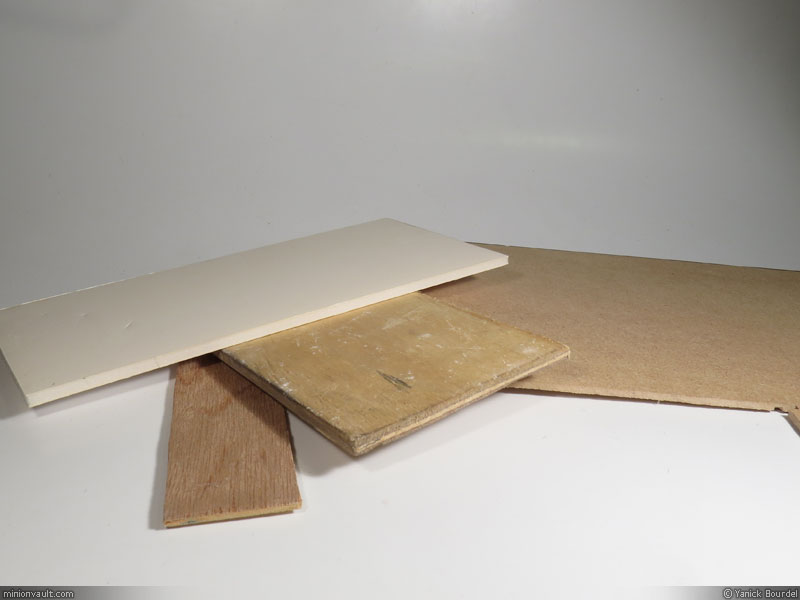
I tend to prefer MDF (medium-density fiber board) or masonite. Both make sturdy bases, are easy to cut with a hack saw or even an cutting knife and they don’t warp easily when you put a lot of glue on them (at least when the terrain pieces are relatively small). Warping is always possible: when you apply a lot of glue / paint on one side of a sheet, it tends to warp as the goo dries, deforming the base. Small bases made of MDF or masonite are perfect; for larger pieces (let say 10 inches X 10 inches and over) I would recommend plywood, to avoid warping. Overall, I like and use masonite most: I bought a few sheets years ago so I have a lifetime supply of bases (from a small-scale modeler’s perspective) in my garage.
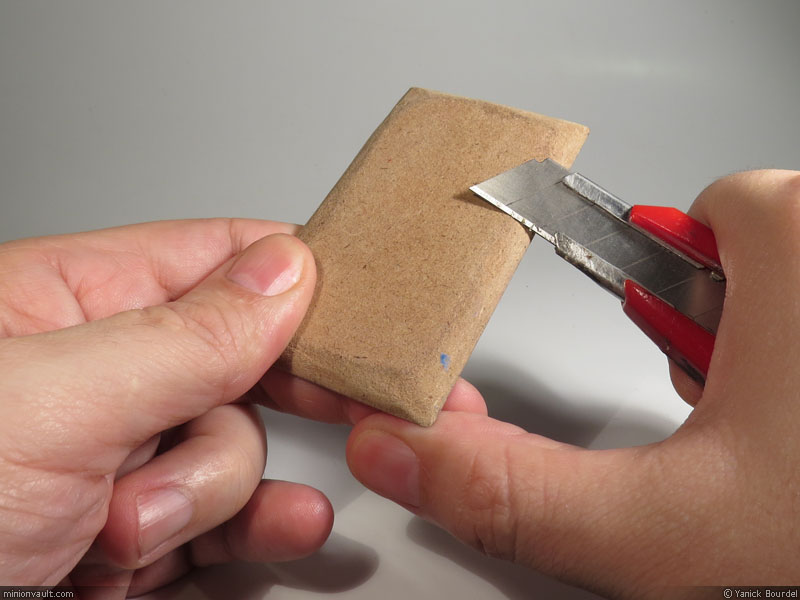
To make a base for my terrain piece, I start by cutting a small piece of masonite with a hack saw (or a table saw if you want super straight edges). I bevel the edges roughly with a wide blade hobby knife: be extra careful there! The blade doesn’t discriminate between masonite and flesh (I learned this the hard way years ago)…
Then I use very coarse sand paper to smooth out the “slopes”…

It doesn’t need to be very smooth or even. I just want to dull the edges and ridges a bit.
I also recommend to sand the top part of the base a bit, to give glue and paint a better grip.
Simple Materials
To start making effective terrain pieces, you don’t need a lot of material, and it sure doesn’t need to be expensive. But some materials are better than others, and for all sorts of reasons…

Styrofoam: I prefer using the blue or pink type (insulation foam) which is smoother and doesn’t chip as easily as the packaging type. But white packaging styro is cool to use as “filler” for larger terrain pieces. Hobby stores also offer pre-cut styrofoam shapes, like spheres, that can be useful.
Cork: Wine bottle cork or cork “tiles” used for renovation. Cork makes great rocks of various sizes. Cork tiles can be cut to uneven shapes and stacked to create a “plateau” ou “mesa” effect, Grand Canyon style – if you have a lot of tiles 🙂
Wood chip: the large brown mass in the center of the photo is a wood chip (cedar). You can buy these in large hardware stores or in gardening stores. Or ask a neighbor if you can take a few wood chips from his garden.
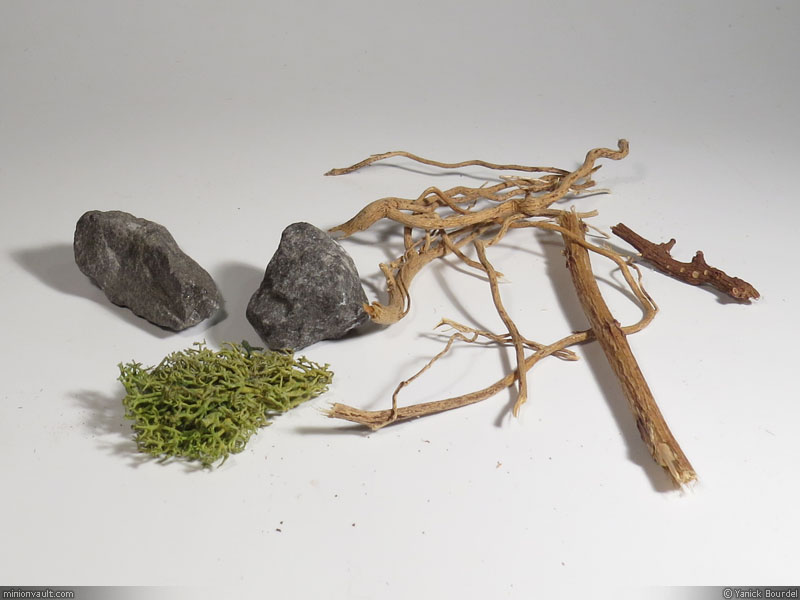
Natural materials like rocks, twigs, roots (roots make especially effective small trees), and moss are also quite useful. For the moss, I advise that you buy a bag of “rubberized” moss from a scale model shop (it is used a lot by railroad modelers). Real moss can be used, but dries out quickly and becomes brittle, while the “rubberized” version (it is coated with a green rubbery paint) lasts much longer.

Real sand is fine for modeling terrain and quite inexpensive (free!). I personally use a blend of different sands, collected from various lakes shores, trails etc. Look for areas where water has flowed then dried out (like along a driveway after some rain: you’ll find all sorts of sizes of sand, rocks and tiny twigs there. At the far right of the pictures, you can see colorful aquarium rocks, which make nice larger boulders for terrains. The whitish rocks in the middle are cat litter rocks (unscented and UNUSED cat litter). These are quite porous and will need to be sealed with glue or primer before being painted, but they make nice rocks, varied in shapes, sizes and with sharper “angles” than smooth aquarium rocks or beach sand. Then we have some specialized materials easily found at hobby stores, like static grass (large container on the left), foam bushes (large container on the right), and colored foam (lower left corner in the photo).

Here you can see an example of pre-mixed ground material I did (using various sized sands, small rocks and cat litter). This ready-made mix helps speed up the process when building multiple projects.

An example of a small dried root I found in the backyard. Gorgeous! It will be used as a dead tree on a desert base one day…
Of course, there’s a lot of other materials we can use for terrain making. I will make another post about that eventually, but for now we have enough material to begin some projects and get interesting results.
In part 2, I will build a very simple terrain piece, just to get a feel for it, and in part 3 we will get to more serious building.
Stay tuned!
