Quick post: my paint job on Reaper Miniature’s EyeBeast.
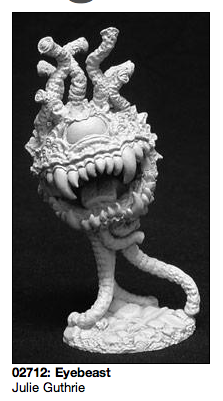
Unpainted original miniature (from Reaper Miniature’s web site)

The finished miniature (the base still needs a few touch ups though).
I coated the miniature with gloss varnish for an extra layer of -yurk!-
The blending on the teeth was made mainly with successive washes.