
Here is the result of the molding and casting of my tiny skulls.

The Army of the Dead!
Here is some photos of the whole process:
1- The molding material is Smooth-On Rebound 25, a popular 2 parts rubber like molding product. Simply mix equal parts of liquid from bottle A and B, stir and brush on the item in several coats to make a mold. If the items are small enough (like my skulls), it can safely be poured on the sculpts in 1 step (no layering).
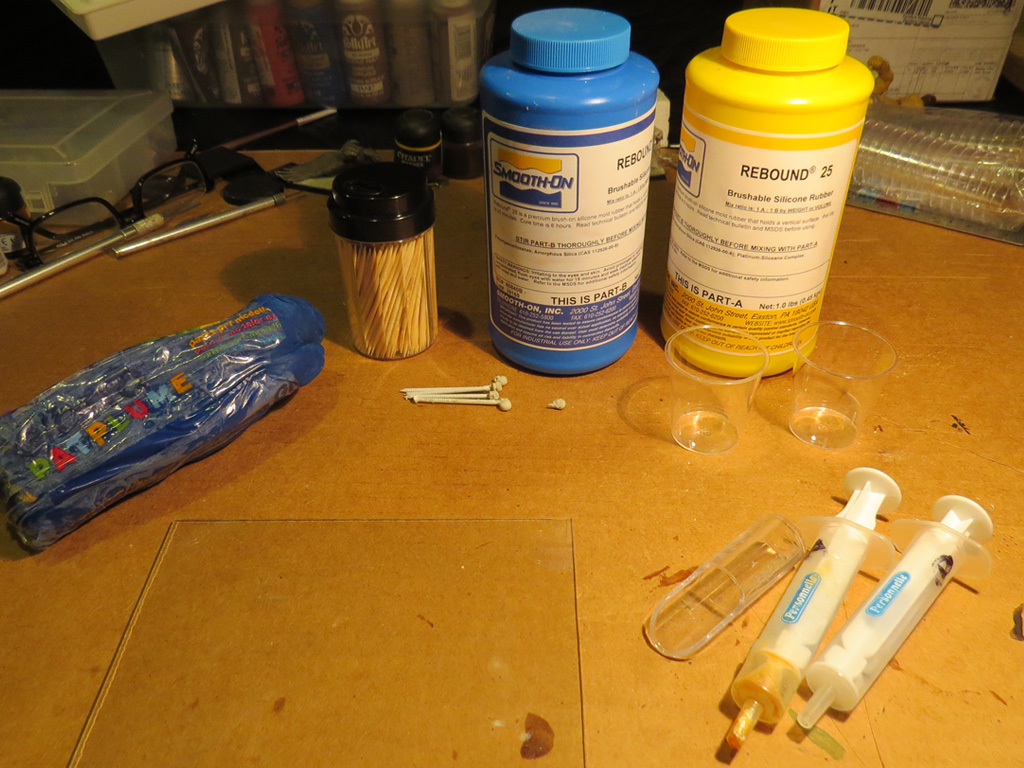
Rebound 25 and tools…
2- I pinned the skulls to a piece of styrofoam and used some Magic Sculpt at the base of each skull to have a leak-proof “seal”. I used toothpicks and more Magic Sculpt to make “channels” through witch the resin will flow: it makes the casting part of the process a bit easier.

Mold crafting…
3- A frame was made out of Lego blocks. Then the pink molding stuff was poured on the skulls.
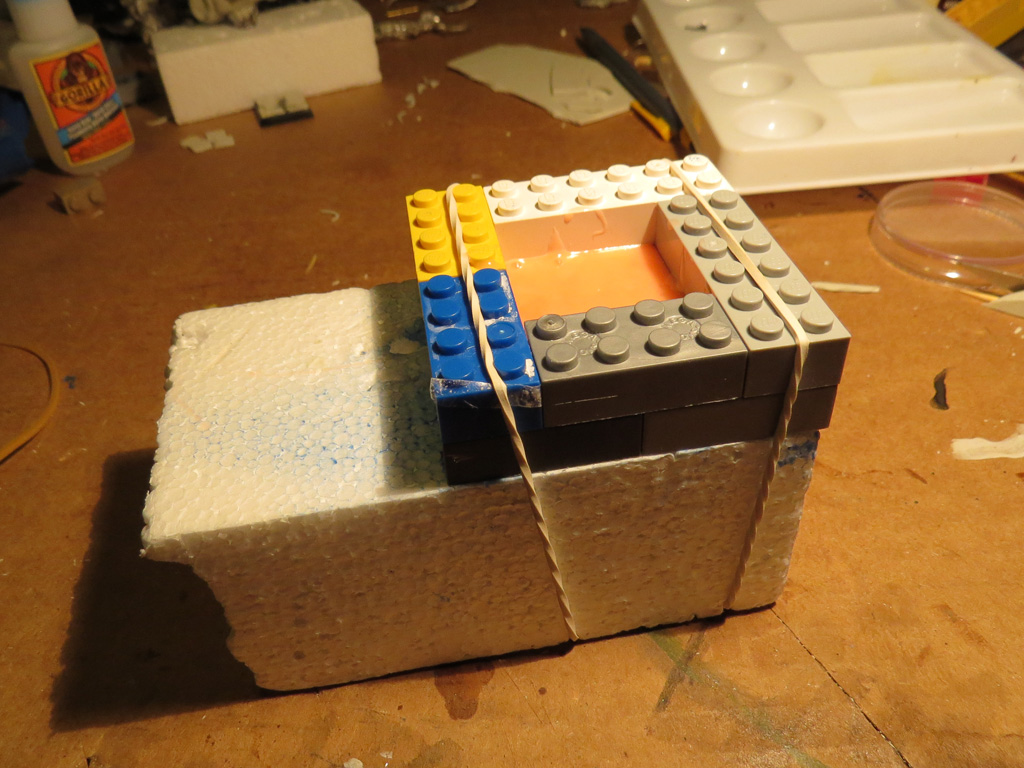
The fun part, where you get to play with Legos again!
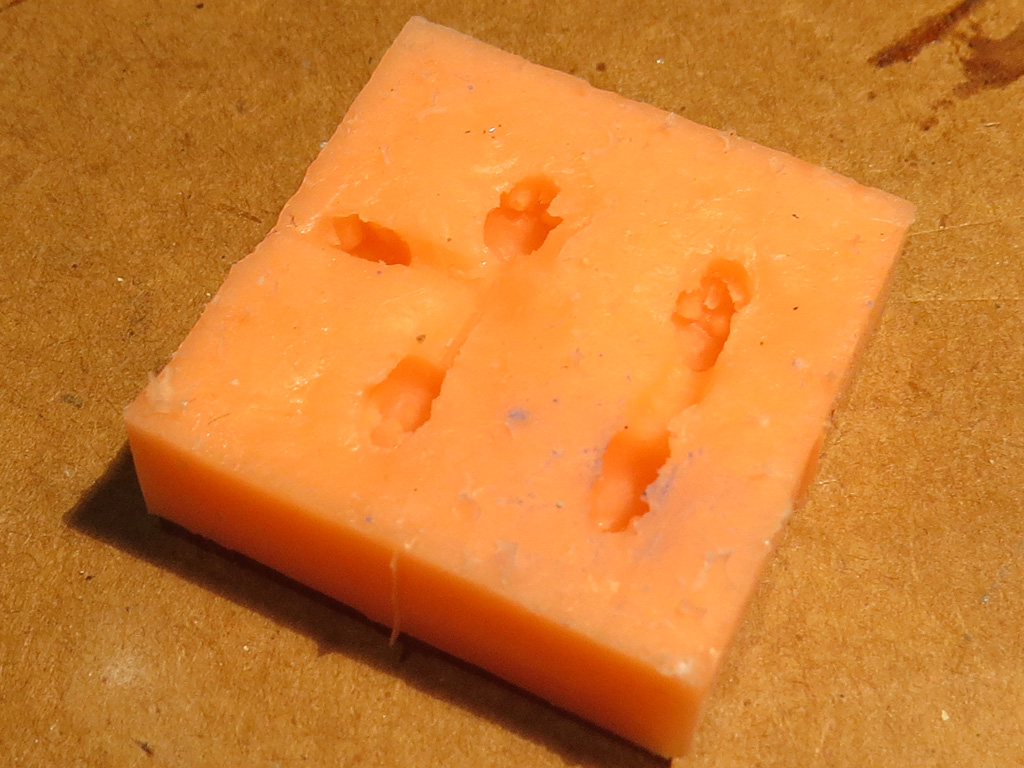
4- After 6 hours of curing (I let it set overnight), we have a nice mold:
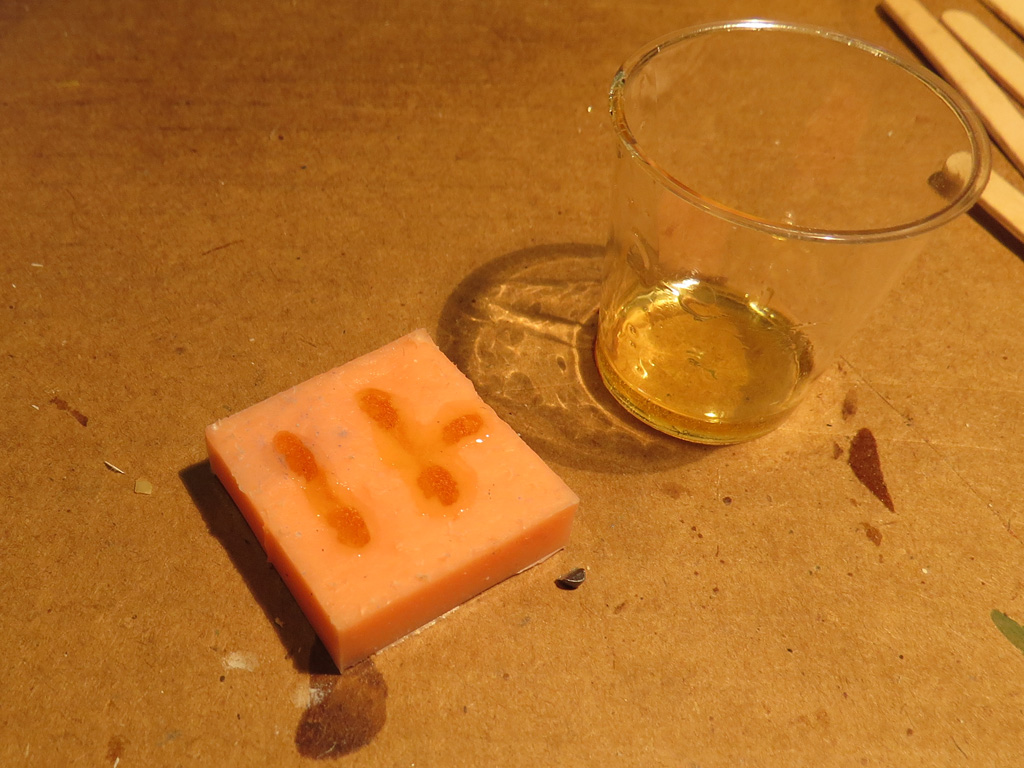
5- For the actual casting, I used Smooth Cast 320 resin, also made by Smooth On. It is a 2 parts resin that cures super fast (15 minutes) and doesn’t smell.

Smooth Cast 320
6- Mixed in equal parts from A and B bottles (I use cheap plastic syringes sold in drug stores for measuring medication). The mix has the consistency of liquid honey. I poured it in the mold and used a toothpick to gently stir it and “brush” it in the cavities to avoid the formation of air bubbles.
Casting, at last!
7- The resin turns white and starts to cool down (it gets quite hot while curing). I don’t actually wait 15 minutes to unmold: it is more like 10-12 minutes. The resin is still soft and I find it easier to unmold and to trim the flashing when the resin is not 100% cured. Once totally cured, this stuff has the consistency of hard plastic and can be sanded or cut, but it is more difficult.
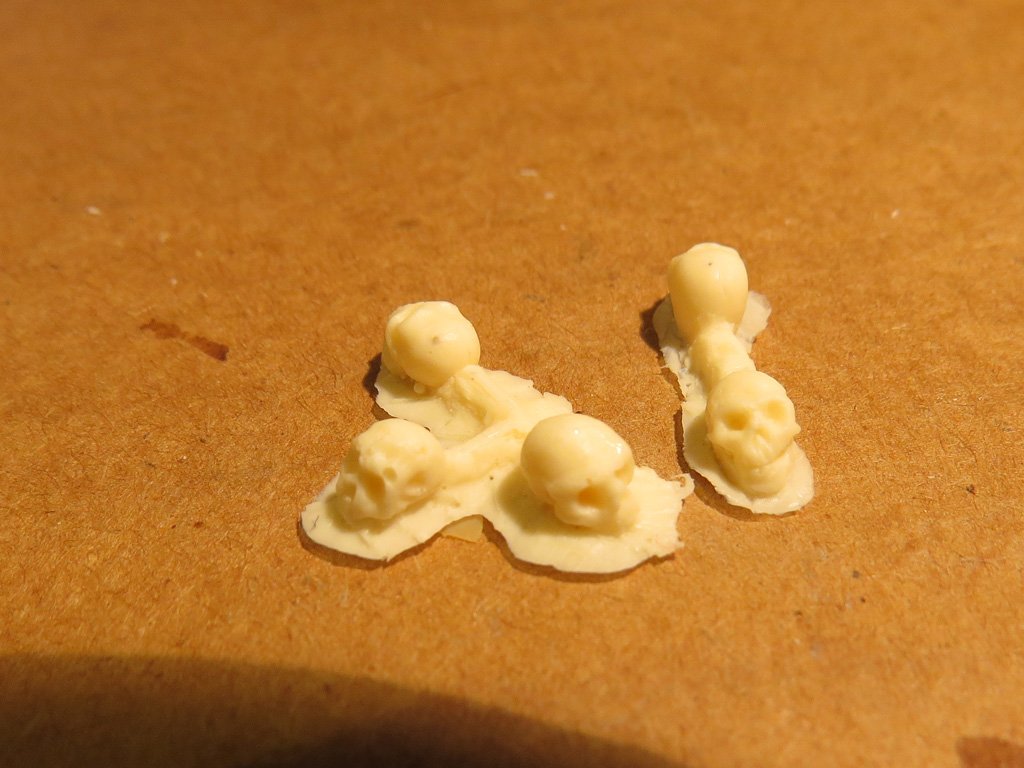
First skulls! Yeah!
Ok… Just a few thousands more and I will be able to recreate this as a diorama 🙂Return of the King – skull avalanche (youtube)

Ooooh these came out so well! I want a set of these bad boys!!
Can’t wait to see your army of ‘a few thousand more’ ehehehehe.